
If you like wine, you'll want to do this deal. Lots of people in the Frugal Living NW circle have done this deal and agree that it's a great value! Firstleaf has brought back a great promotion for a very limited time -- Get 6 bottles of wine for $29.95 + FREE shipping. I did this deal last Black Friday and the box of wine arrived in less than a week. Super easy! This promo makes each wine that's typically priced $20-$30 less than $5 shipped. When you sign up, you'll take a quiz that will help figure out which wines they send you! Here's how to do the deal: Go to Firstleaf through this link. Click the "Claim Offer" button or really Keep Reading
*HOT* Get 6 bottles of wine for $29.95 + FREE shipping
Get a year Crafty membership for just 65¢ TOTAL (online crafting classes for the whole family)

Get a premium annual membership to Craftsy for just 65¢! The annual membership is regularly $97, so this deal is AMAZING! This will come in handy over winter vacation with your kids or grandkids. With this promotion, you'll get all of this for just 65¢ TOTAL for the year: Access to more than 1,500 premium online crafting classes for adults and kids: quilting, sewing, cooking, crafting, fabric arts, crocheting, baking, drawing, painting, and more. Admission to exclusive LIVE online streaming events. Weekly newsletter with insights and inspiration. Access to online instruction across 20+ hobbies. Free downloadable Keep Reading
*HOT* Get a KiwiCo activity kit for kids just $4.95 (BLACK FRIDAY DEAL )
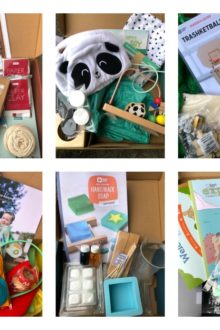
KiwiCo, a subscription activity box service for kids, is offering a special discount just in time for Christmas! Use the code GIFT at checkout to get most boxes for $4.95 shipped. This is 80% off the regular price. If you have older kids, you especially need to buy a box. Their Tinker and Doodle boxes are fabulous (the Eureka and Maker Crate is more expensive, but the code works on those as well). My older kids love, love, love them! Here's how to do the deal: Go to KiwiCo. Click or tap the "Get Started" button. Do NOT click "Store." Click "Choose Your Plan." Fill in the child's info and answer the questions, including which box Keep Reading
The BEST Black Friday Deals 2023

Black Friday is rolling! Check out our master list of individual deals we've found today here. Here's a master list of all the best deals we've found (we'll add to this list as the week progresses): Get Hulu streaming service for 99¢/month for 12 months Pay just 99¢ per month to watch tons of your favorite shows for the next year! You can cancel at any point as your discount subscription is month-to-month. Your subscription will go up to $7.99 per month at the end of your year, but you can easily cancel. Get HBO Max for $2.99/month for 6 months Pay $2.99 per month for up to six months for MAX, HBO's streaming service. You can Keep Reading
Get Hulu for 99¢ per month for a year! (BLACK FRIDAY DEAL)

Hulu Black Friday Deal This promotion comes around once a year and it's live until Monday! Get Hulu for just 99¢ per month for the next year! Hulu with Ads is regularly $7.99 per month so this is an amazing deal and it's only available right now! Go HERE to sign up. Once you have your account created, you can go to your Smart TV or streaming device and select the Hulu app. Enter your account information and you can immediately start watching shows! Your account will work on your phone as well! If you really, really want to watch network TV shows but want to get rid of cable or satellite, Hulu is the way to go. You can cancel your Keep Reading
13 Black Friday Strategic Shopping Tips (guaranteed to save you money)
Best Black Friday Shopping Tips UPDATED FOR 2023! Black Friday is just around the corner and it's the BEST time of the year to get deals on just about everything on your shopping list. Use these 13 best Black Friday shopping tips to help you save big money (and time) this year! Shop "Black Friday Week" Black Friday is no longer just the day after Thanksgiving. The sales offered by retailers (both online and brick-and-mortar) now extend from the Sunday before Thanksgiving to Cyber Monday, or the Monday after Thanksgiving. This will be November 19-27 this year. Start looking for sales, special price drops, and one-day only flash sales in Keep Reading
Safeway Deals for October 25-31, 2023
Here are the best deals at Safeway this week. The Safeway ad runs Wednesday-Tuesday in the Pacific Northwest. Along with sales and coupons, you can also get extra savings with two smart phone cash back apps: Ibotta Checkout 51 Just download the apps and browse for offers available at Safeway! WEEKLY DEALS Grab a $5 off $30 or more grocery purchase digital for u coupon USDA Choice Boneless Beef Petite Sirloin Steaks on sale $3.47/lb - with digital for u coupon, first 2, value pack Fresh Signature Farms Ground Beef (80% lean) on sale $2.97/lb - limit 4 Butterball Ground Turkey (85% lean) on sale $2.97/lb - limit 4 Raw Keep Reading
- 1
- 2
- 3
- …
- 1311
- Next Page »